
This is a guide which will walk you through the installation of Haxe, OpenFL and Flixel in Windows 11. Many of the steps mentioned here are taken from the official websites of Haxe and OpenFL (haxeflixel.com and openfl.org). There are some steps which I have discovered via trial and error and AI assistants and I am trying to compile all the steps in a single blog post which you and me can follow in order to install the whole Haxe framework for game development.
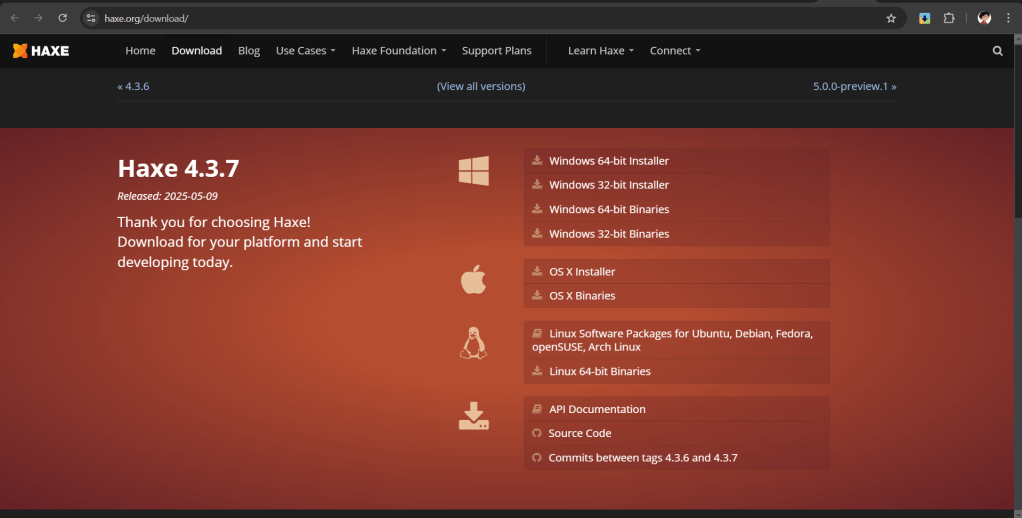
To get started we need the ‘haxelib’ command so we need to head over to https://haxe.org/download/ and download the latest version of Haxe.
After downloading and installing haxe we can head over to our ‘Terminal’ and enter the following commands:
haxelib install openfl
haxelib run openfl setup
This will install openfl. However, what we want ideally is to be able to use the ‘openfl’ command in our terminal which we won’t be able to do unless we add the openfl command as an executable batch file in our path. Openfl setup is supposed to do that for us but it fails so we need to do it ourselves. The steps for this are as follows:
Step 1: Create an openfl.bat file in a folder like C:/openfl/
Step 2: Write the following script in that .bat file:
@echo off
haxelib run openfl %*
Save the file and exit.
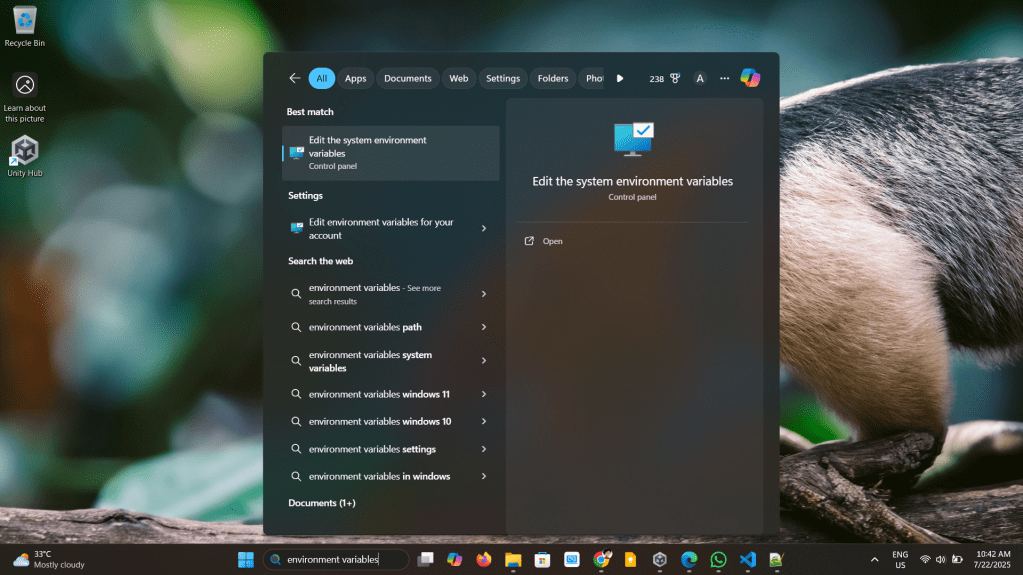
Step 3: Now go to the ‘Search’ input in the Task bar and type ‘environment variables’ and the Edit the system environment variables option will show up in the Start Menu. Click on it and a dialog box will open which will have the option ‘Environment Variables’. Click on it and the environment variables management dialog box will open. In this dialog box there are two sections. One is for the system’s environment variables and the other is for the user’s environment variables. We need to edit add the path to the openfl folder that we created in step 1 to the ‘Path’ environment variable in both the system and the user side. After doing this we can click on ‘Ok’ and close the dialogs.
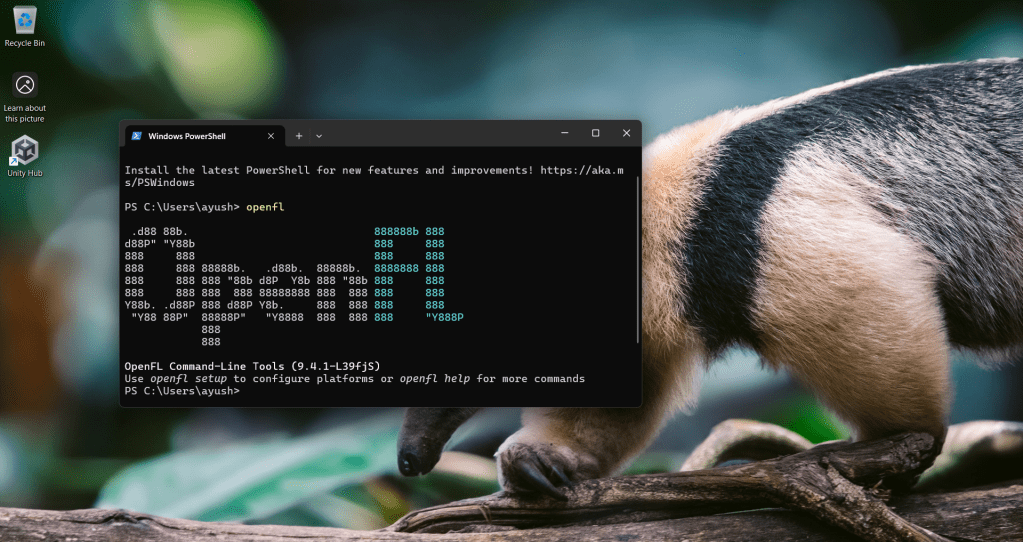
Step 4: Open a new terminal and type ‘openfl’ and the openfl command will start to work.
Using openfl alone we can get started with some graphics programming and game development. However, in this guide we will also install flixel. Run the following commands:
haxelib install lime
haxelib install flixel
haxelib run lime setup flixel
haxelib run lime setup
haxelib install flixel-tools
haxelib run flixel-tools setup
This should install the lime and flixel frameworks and it should expose the command ‘flixel’ to our windows terminal but it doesn’t. We again have to do the steps that we did for the openfl command. The steps are presented again:
Step 1: Create an flixel.bat file in a folder like C:/flixel/
Step 2: Write the following script in that .bat file:
@echo off
haxelib run flixel-tools %*
Save the file and exit.
Step 3: Add the path to the C:/flixel/ folder to the ‘Path’ environment variable for both the system and user accounts as mentioned in the steps for openfl.
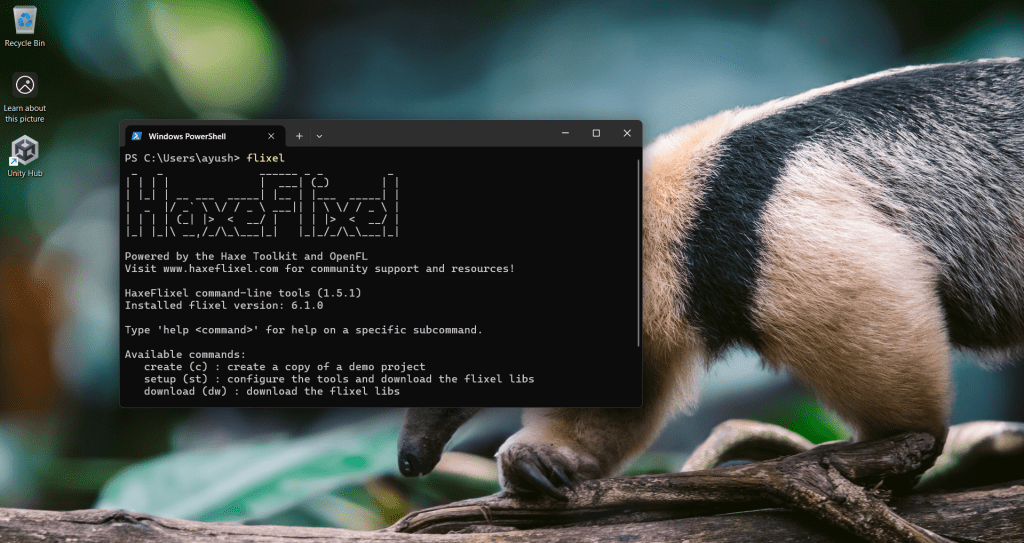
Step 4: Open the terminal and type ‘flixel’ and the command should work now.
That is the end of this guide. After installing openfl and flixel commands properly we can start creating game folders and working on the tutorials available on the websites: https://haxeflixel.com/documentation/hello-world/ and https://www.openfl.org/learn/haxelib/tutorials/displaying-a-bitmap/.
Anyway, I am heading over to do some work now and later I will follow one of these tutorials. Hope this guide helps you.

Leave a comment